

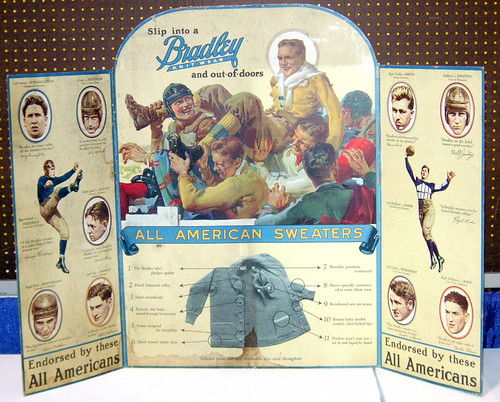
Example of a WWI era Board Advertisement display before treatment (left) and after treatment (right).
A recent question, received from one of our readers, involves how to deal with damaged die cut billboard advertisement displays. The reader described their display piece as being water damaged with warping in the board and large losses in the corners. They asked:
"Is it better to remove the printed paper from the damaged board? What is the best way to go about stabilizing it? Can the water damage and the missing corners be fixed?"
Example of die cut ad display with unique shape circa 1930. Image courtesy of SportsAntiques.com
Die cut ad displays are a common form of ephemera we see all the time. These items were printed on a facing paper which was adhered overall to a board (generally poor quality). Often, they were die cut in a unique shape suitable to be propped up near the product to be used as a promotional tool such as the example directly above of a Bradley Sweaters Ad circa 1930.
Because the boards were generally of a poor quality, these items are very susceptible to damage such as staining and warping due to water damage, and losses and tears throughout the board and facing paper, which you can see present in the example below.

Example of water damaged board with staining, warping, tears, losses, and separations in paper from board.
Although the treatment of items like these can be difficult and time consuming, it is possible for them to be stabilized and restored to much of their previous glory. To answer the question of how this is done, we'll separate the question into two issues: Stabilizing the item and filling any losses.
To stabilize the item, we don't suggest taking the paper off the board, like we would for regular items which have been mounted to board due to previous poor framing techniques. In die cut ads like this, the board is a necessary part of the character of the piece. Although I am not a professional appraiser, I would also imagine it would take away from the item's monetary value. Instead we suggest leaving the board item intact and focusing the treatment on only the areas of damage.
We would suggest stabilizing the item by a series of treatments starting off with general surface cleaning. We would then attempt to re-adhere the separating paper and board layers using archival wheat starch paste. If possible, we would also attempt to reduce the dark linear staining due to water damage locally, meaning focused in the areas of damage. Due to the nature of the board, the treatment for reducing disfiguring staining is very limited on items like this, although we've had much success in substantially reducing them. We would then try to flatten the board overall to reduce the warping.

Example of die cut ad with large fragment and losses in lower left corner of board.
To answer the next question, it is possible to repair the board and fill any missing areas. In steps similar to re-adhering areas of separating paper and board issues, we would reattach any sections which have broken off by reattaching the fragment to the board with plies of Japanese tissue and wheat starch paste, possibly also using a cellulose powder.
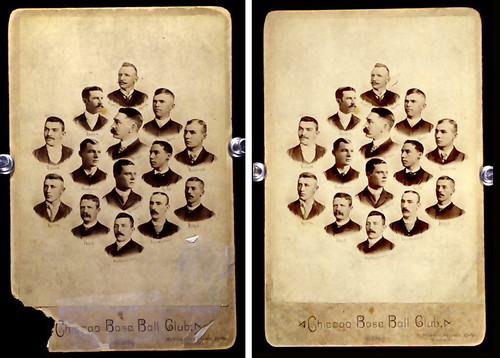
Photos mounted to board are also a good candidate for this kind of treatment like these examples of before and after treatment images of this turn of the century sports photo.
Losses can be filled using a matching antique board. We have a large collection of antique board and papers in our lab which can be used to match to the original board and facing paper by weight, thickness and texture. When we find a matching board and facing paper, they will be adhered together, and then cut and shaped to fit the missing area. The board fill will be placed as seamlessly as possible into the missing area using the same techniques we used for repairing fragments. Fills can then be inpainted to blend in with the surrounding area.
Items like these, although very challenging can be some of the most rewarding treatments because they often yield stunning results as you can see in the before and after treatment pictures above. Click here to see more exciting before and after treatment images from our various projects!
_____________________________
If you have any questions you'd like to be featured in our Ask the Conservator series, please email us with "Ask the Conservator" in the subject line.

